Introduction
With LVM, we can create logical partitions that can span across one or more physical hard drives. First, the hard drives are divided into physical volumes, then those physical volumes are combined together to create the volume group and finally the logical volumes are created from volume group.Before we start, install the lvm2 package.
On CentOS use yum:
$ sudo yum install lvm2
On Ubuntu use apt:
$ sudo apt install lvm2
To create a LVM, we need to run through the following steps:
- Select the physical storage devices for LVM
- Create the Volume Group from Physical Volume
- Create Logical Volumes from Volume Group
Creating LVM Volumes
To begin, use the fdisk command to create physical partitions for the storage device on which you want to create logical partitions. Here we have an 500GB drive, located on device /dev/sdc:
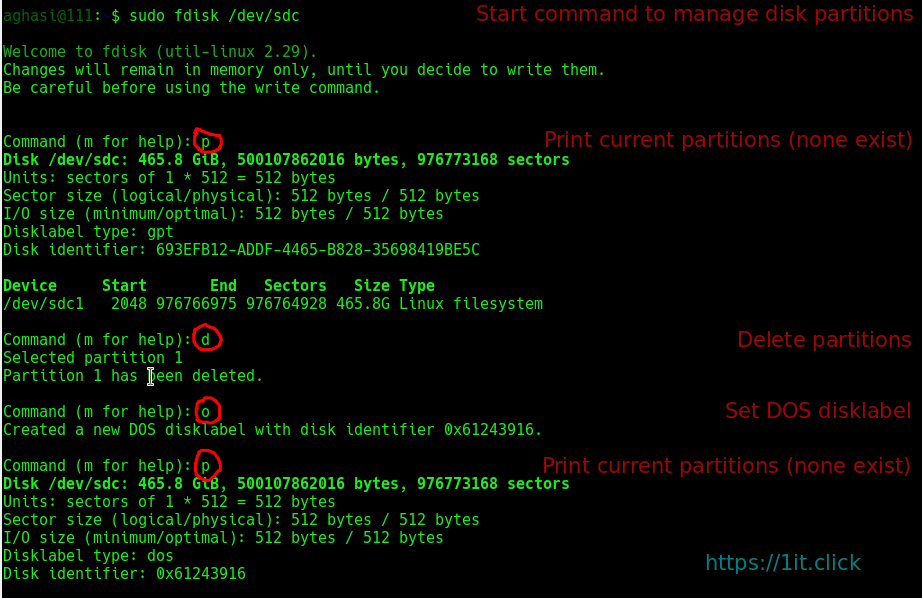
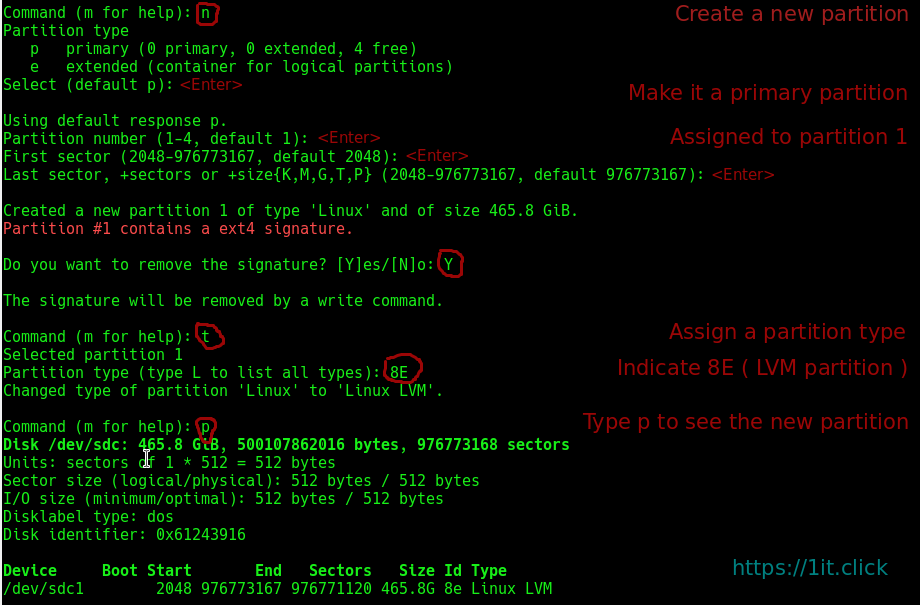
Before proceeding, make sure you have made the correct changes to the correct partition! If everything looks correct, write the new partition table, as follows:

The kernel still uses the old table. The new table will be used at the next reboot or after you run partprobe(8) or kpartx(8).
Back at the shell prompt, use the sfdisk command to see the partitioning on the drive:

or
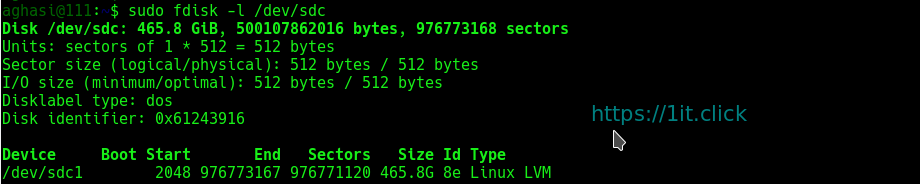
Next, make /dev/sdc1 a new LVM physical volume and use the pvs command to view information about physical LVM volumes:

Then use vgcreate to create the vg1 volume group and list the active current volume groups:

Use lvcreate to create a new LVM partition of 1 GB from the vg1 volume group. Then use lvs to see the logical volume and vgs to see that the amount of free space has changed:

To create an ext4 filesystem on the lvm partition, use the mkfs.ext4 command as follows:
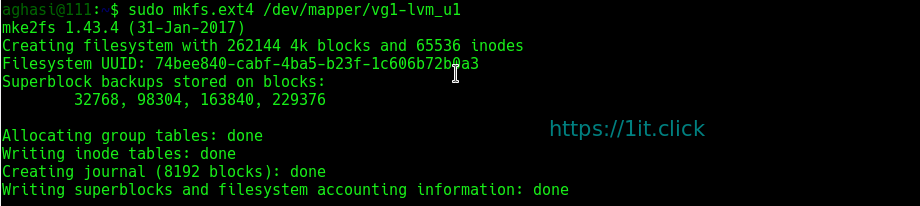
The ext4 filesystem has now been created and the LVM volume is ready to use.
Using LVM Volumes
To use the new volume just created, represented by /dev/mapper/vg1-lvm_u1, create a mount point /mnt/u1 and mount the volume. Then use df to check the available space:

At this point, the file system contains only the lost+found directory:

Copy a file to the new file system. For example, choose one of the kernel files from the /boot directory and copy it to /mnt/u1:

Run md5sum on the file you copied and save the resulting checksum for later:

Growing the LVM Volume
Say that you are running out of space and you want to add more space to your LVM volume. To do that, unmount the volume and use the lvresize command. ( Actually, it is not required that you unmount the volume to grow it, but it is done here as an extra precaution. ) After that, you must also check the file system with e2fsck and run resize2fs to resize the ext4 filesystem on that volume:
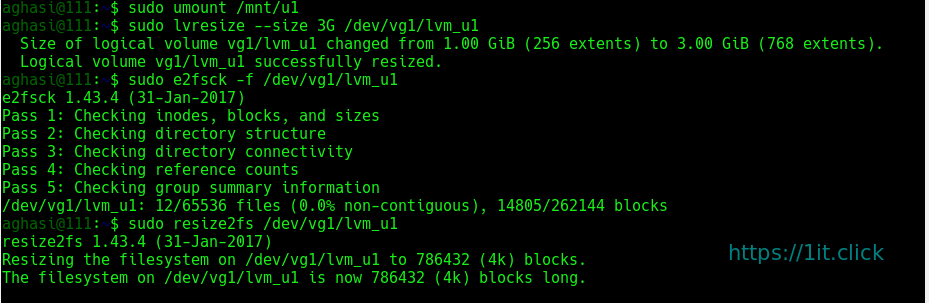
In the example just shown, the volume and the file system are both resized to 3 GB. Next, mount the volume again and check the disk space and the md5sum you created earlier:

The newly mounted volume is now 3 GB instead of 1 GB in size.
Shrinking an LVM Volume
You can also use the lvresize command if you want to take unneeded space from an existing LVM volume. As before, unmount the volume before resizing it and run e2fsck (to check the file system) and resize2fs (to resize it to the smaller size):
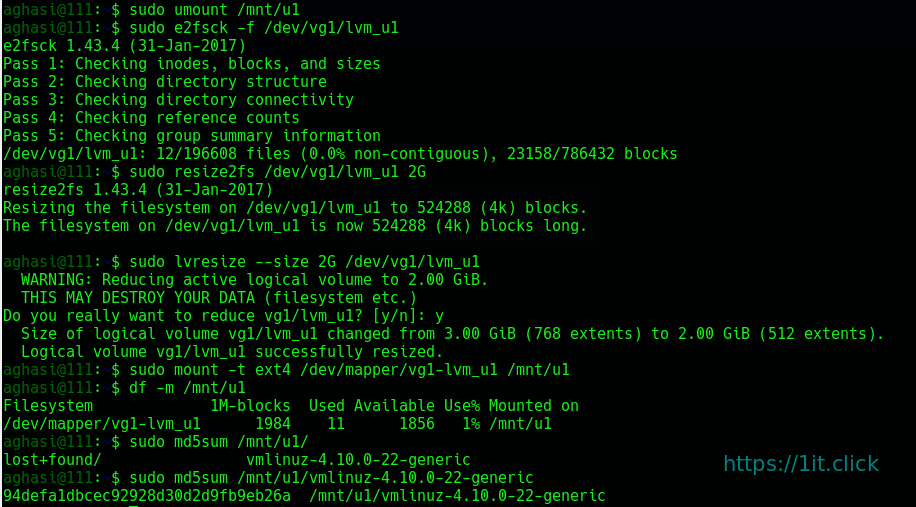
The newly mounted volume appears now as 1984 MB instead of 2992 MB in size.
Removing LVM Logical Volumes and Groups
To remove an LVM logical volume from a volume group, unmount it and then use the lvremove command as follows:

To remove an existing LVM volume group, use the vgremove command:
